
How to Use Baby Oil for Hair Properly and Safely
A complete guide on how to use baby oil for healthier, softer, and shinier hair. Learn the correct application steps and its benefits.
Kapanlagi.com - A caliper is one of the precision measuring tools commonly used in various fields of engineering and education. This tool has advantages over a regular ruler because it can measure external diameter, internal diameter, and the depth of an object with high accuracy. The way to use a caliper measuring tool is actually quite simple if you understand its parts and functions well.
The precision level of a caliper reaches 0.01 cm or 0.1 mm, which is much more precise compared to a ruler that only reaches 0.1 cm or 1 mm. This makes the caliper a preferred measuring tool for technicians and practitioners in laboratories and manufacturing industries. Using a caliper measuring tool correctly will result in accurate and reliable measurements.
Quoting from Class X Physics Learning Module by Saroji, the caliper was first invented in 1631 by a French mathematician named Pierre Vernier. Since then, this tool has continued to evolve and has become an important instrument in the world of precision measurement to this day.
Understanding and Function of Calipers (c) AI Illustration
A caliper is a measuring tool specifically designed to measure length, outer diameter, inner diameter, and depth of an object with a high level of precision. This tool has two main reading scales, namely the main scale and the vernier scale, which allows measurements to be made down to fractions of a millimeter. Unlike a regular ruler that can only measure flat surfaces, a caliper can measure various shapes of objects, including cylindrical shapes or those with holes.
The main functions of a caliper are very diverse and practical. First, this tool can measure the outer diameter of an object by clamping the object using the outer jaws. Second, the caliper can measure inner diameters such as holes or gaps using the extended inner jaws. Third, this tool is equipped with a depth measuring rod that can be used to measure the depth of holes or tubes by inserting it into the object being measured.
In addition to these three main functions, a caliper can also be used to measure material thickness, object width, and various other dimensions that require a high level of accuracy. The advantage of a caliper lies in its ability to provide detailed and accurate measurement results, at a relatively affordable price compared to other precision measuring tools. Its compact size also facilitates mobility, allowing it to be taken to various work locations.
According to Byjus, a caliper is known as a tool that can measure the smallest diameter of an object with accurate measurements if used correctly. This makes this measuring tool very important in quality control processes in manufacturing industries, laboratory research, as well as educational practices in schools and universities.
Parts of Calipers and Their Functions (c) AI Illustration
Understanding the parts of a caliper is an important first step before learning how to use the caliper measuring tool. Each component has a specific function that supports one another to produce accurate measurements.
Outer jaws consist of a fixed jaw and a sliding jaw that function to measure the external dimensions of an object such as diameter, width, or length. When measuring, the object is clamped between these two jaws until it fits, then the measurement result can be read on the scale. Inner jaws also consist of two similar parts but are positioned at the top, functioning to measure internal diameters such as holes or gaps by extending into the object being measured.
Depth gauge is a thin rod located at the end of the caliper, specifically designed to measure the depth of holes or tubes. The way to use it is by inserting this rod into the hole until it touches the bottom, then reading the result on the main scale. Main scale is the length scale displayed on the fixed jaw, usually in centimeters or inches, with a general length of 15-17 cm. This scale provides the basic reading of the measurement.
Vernier scale is a short scale found on the sliding jaw, functioning to add an extra level of accuracy to the measurement. This scale is usually expressed in millimeters or fractions of an inch. The length of 10 vernier scale units is equivalent to 9 mm on the main scale, so one unit of the vernier scale is worth 0.9 mm. Locking screw functions to lock the position of the sliding jaw so that it does not shift during the measurement process, ensuring that the measurement result remains stable and accurate.
Citing from High School Physics Learning Module Class X by Saroji, a good understanding of each part of the caliper will make it easier for users to perform measurements accurately and avoid reading errors that can affect the accuracy of the results.
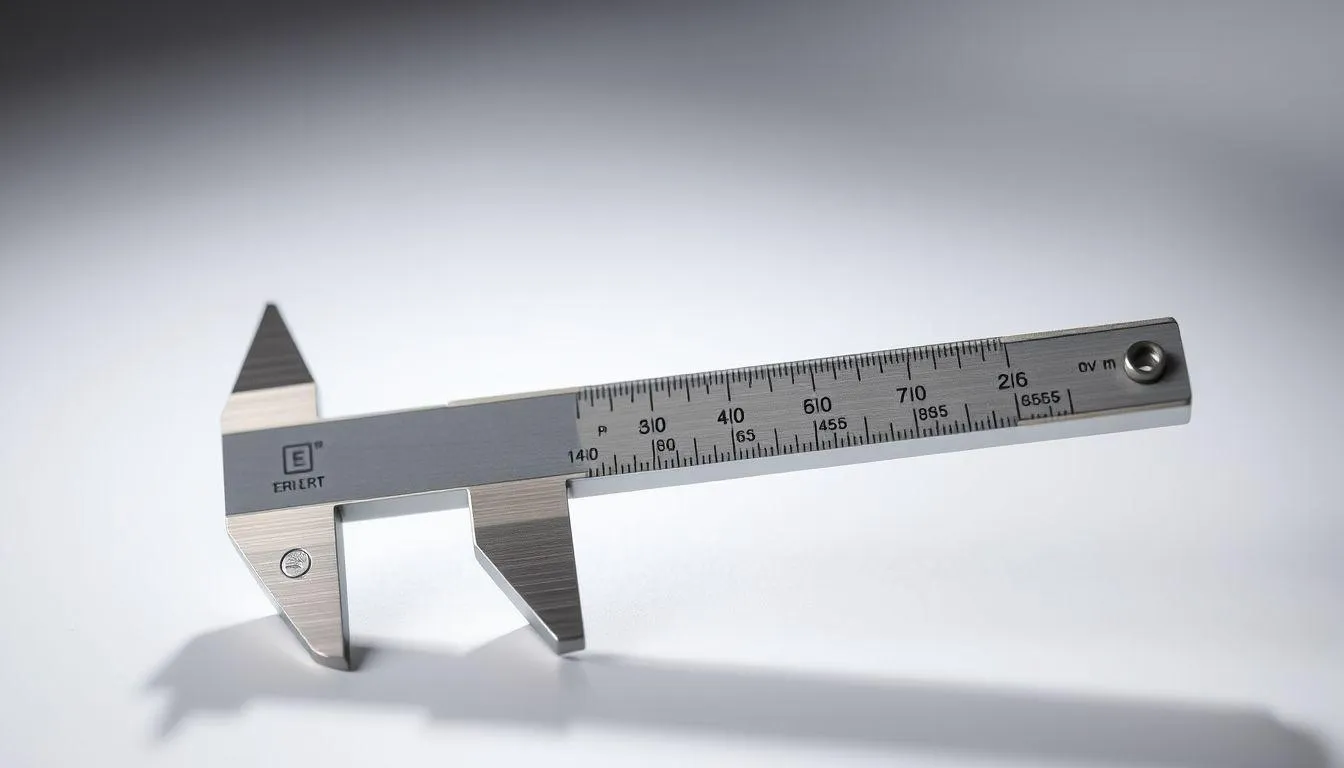
Types of Calipers (c) AI Illustration
As technology develops, calipers come in various types tailored to measurement needs and ease of use. Choosing the right type of caliper will affect the efficiency and accuracy of measurement results.
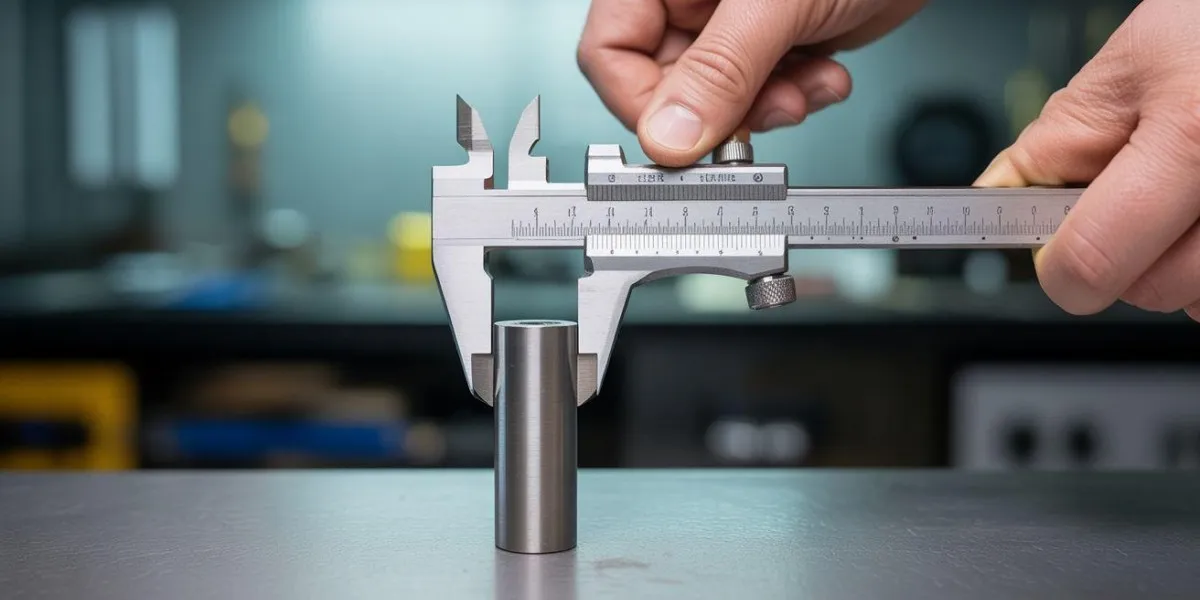
The proper use of a caliper will yield accurate and reliable measurements. Here are the systematic steps in using a caliper to measure the diameter or dimensions of an object.
The first step is to perform an initial calibration by ensuring that when both jaws are tightly closed, the scale shows a zero reading. This is done by sliding the movable jaw until it touches the fixed jaw, then check whether the zero mark on the main scale and the vernier scale are aligned. If it does not show zero, it indicates a zero error that must be accounted for in the final measurement results. Also, ensure that the surface of the object to be measured is clean and free from dirt that could affect accuracy.
The second step is to open the caliper jaws by loosening the locking screw and pulling the movable jaw to the right until it is wide enough to place the object to be measured. To measure the outer diameter, use the outer jaws by placing the object between the two jaws. To measure the inner diameter, such as a hole, use the inner jaws by inserting them into the hole. To measure the depth, use a depth gauge by inserting it into the hole until it touches the bottom.
The third step is to position the object accurately between the jaws. Ensure the object is perpendicular to the jaws to avoid measurement errors due to incorrect angles. Slowly pull the sliding jaw to the left until it securely grips the object, but not too tightly to avoid damaging the object or the measuring tool. Once the position feels right, turn the locking screw until you hear a "click" sound indicating that the jaws are securely locked.
The fourth step is to carefully read the measurement results. First, observe the main scale, and read the number just before the zero line on the vernier scale. Then, find the line on the vernier scale that is exactly aligned with one of the lines on the main scale. The number on the vernier scale that aligns is the decimal value of the measurement result. Add the main scale value to the nonius scale value to obtain the final measurement result.
According to Geeks for Geeks, precision in every step of using a caliper is very important for producing accurate measurements. Avoid applying excessive pressure when closing the jaws and ensure that your eye position is aligned with the scale when reading the results to avoid parallax errors.

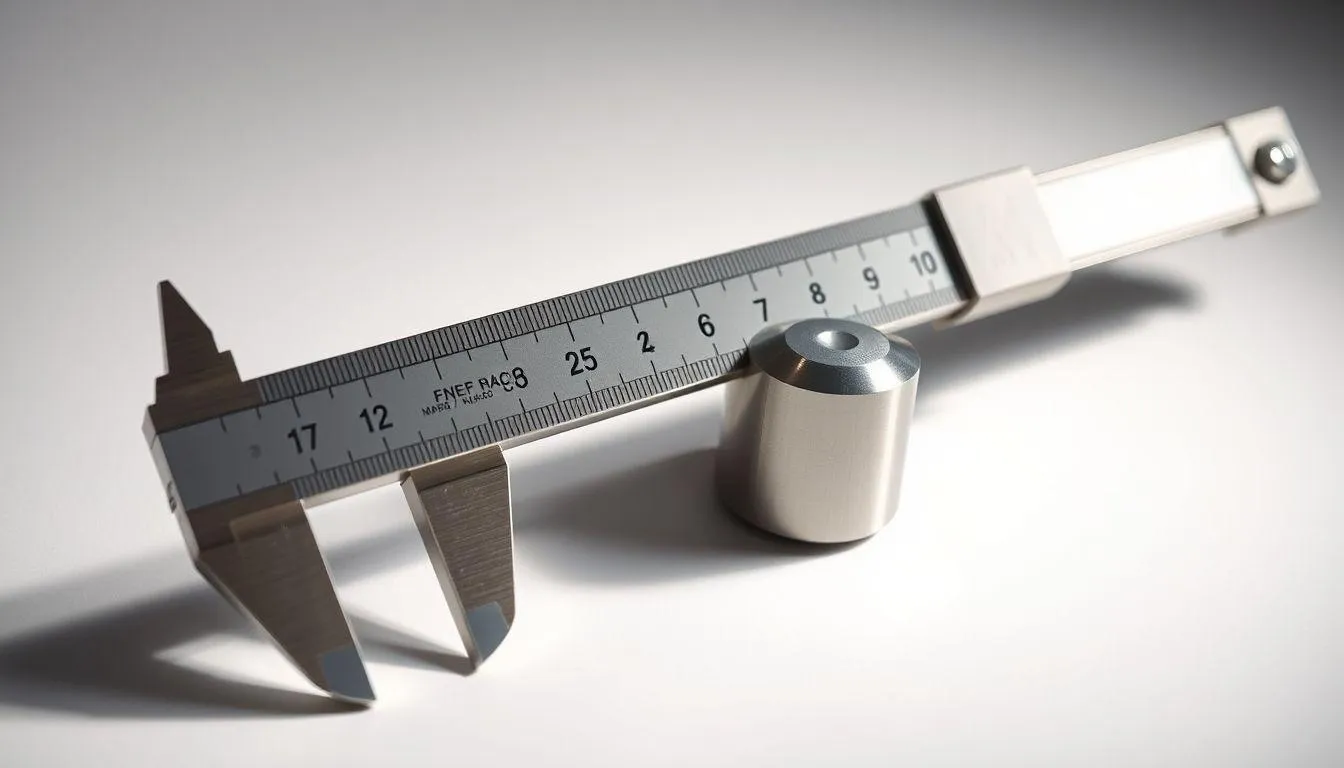
How to Read Caliper Measurement Results (c) AI Illustration
Reading the measurement results from a caliper requires an understanding of the dual scale reading system it has. The correct reading process will yield measurement values accurate to a precision level of 0.01 cm or 0.1 mm.
The reading begins by identifying the value on the main scale. Note the last number on the main scale that is just before the zero line on the nonius scale. For example, if the zero line of the nonius scale is after the number 2 and before the number 3 on the main scale, then the reading of the main scale is 2 cm. If there is an additional line between the round numbers (usually indicating 0.5 cm or 5 mm), then that value must also be accounted for.
After obtaining the main scale value, the next step is to read the nonius scale. Look for the line on the nonius scale that is exactly aligned with one of the lines on the main scale. The number indicated on the aligned nonius scale line is the decimal value that should be added to the main scale result. For example, if the 7th line on the overlapping vernier scale is aligned, then the value of the vernier scale is 0.07 cm or 0.7 mm.
The final measurement result is obtained by adding the main scale value and the vernier scale value. For instance, if the main scale shows 2.3 cm and the vernier scale shows 0.07 cm, then the measurement result is 2.3 cm + 0.07 cm = 2.37 cm or 23.7 mm. It is important to always pay attention to the units used to avoid errors in recording the results.
To improve reading accuracy, ensure that the eye position is aligned with the scale being read to avoid parallax errors. Take readings in a well-lit area so that the lines on the scale are clearly visible. If possible, take measurements several times and average the values to obtain more accurate and reliable results.

Care Tips and Use of Calipers (c) AI Illustration
Proper maintenance of the caliper will preserve its accuracy and extend the tool's lifespan. Some things to consider when maintaining a caliper include keeping the tool clean by wiping the jaws and scale with a clean cloth after use. Avoid touching the scale with dirty or oily hands as it can leave residues that affect readings.
Store the caliper in a dry place with stable temperature to avoid expansion or contraction of materials that can affect accuracy. Use a special storage box that is usually provided when purchasing the tool. Avoid dropping or bumping the caliper as it can cause damage to the jaws or scale, which will affect measurement results.
When using the caliper, avoid applying excessive pressure on the jaws as it can cause deformation or damage. Do not use the caliper to measure objects that are too large beyond the tool's maximum capacity. Perform periodic calibration to ensure measurement accuracy is maintained, especially if the tool is frequently used in work requiring high precision.
For digital calipers, ensure the battery is always in good condition and replace it periodically. Turn off the tool after use to save battery power. Avoid exposure to water or excessive humidity that can damage electronic components. With proper maintenance, the caliper can last a long time and continue to provide accurate measurement results.

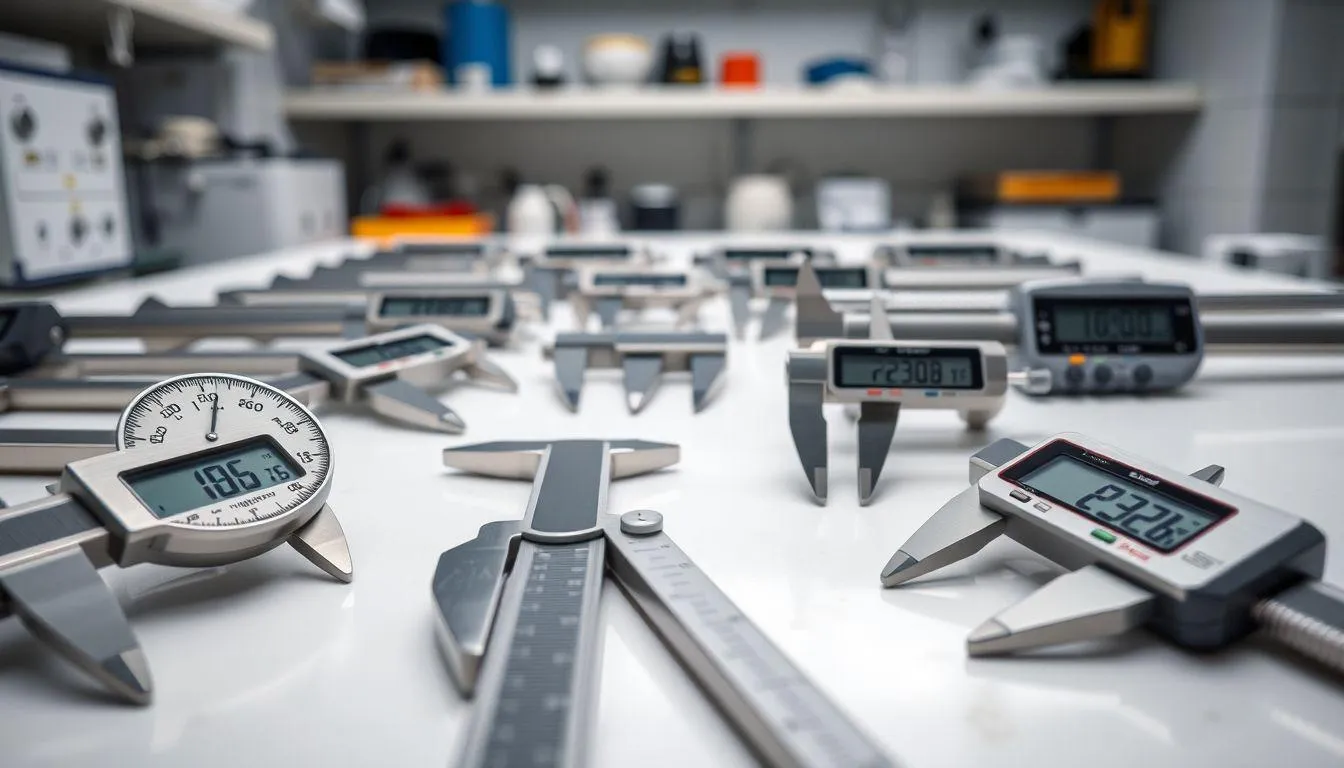
FAQ (Frequently Asked Questions) (c) AI Illustration
A caliper has a much higher level of precision compared to a regular ruler, which is 0.01 cm or 0.1 mm, while a ruler is only 0.1 cm or 1 mm. Additionally, a caliper can measure inside diameter, outside diameter, and depth of an object, while a ruler can only measure length on a flat surface.
Zero error occurs when both jaws are closed but the scale does not show a zero reading. To address this, note the error value and subtract or add it to each measurement result. If the error is positive (the nonius scale passes zero), subtract the error value from the measurement result. If the error is negative (the nonius scale has not reached zero), add the error value to the measurement result.
A caliper can accurately measure small objects, but it is limited to the tool's maximum capacity, which is generally around 15-17 cm. For very small objects or those requiring higher precision, a screw micrometer can be used, which has a precision of up to 0.01 mm. The choice of measuring tool should be adjusted according to the size and level of precision required.
Differences in measurement results can be caused by several factors such as parallax error when reading the scale, inconsistent pressure when gripping the object, incorrect positioning of the object, or unaccounted zero error. To obtain more accurate results, take measurements multiple times and average the values.
Clean the caliper using a soft, clean, and dry cloth after use. For stubborn dirt, you can use a cloth slightly dampened with alcohol or a special cleaning solution for measuring tools. Avoid excessive use of water or harsh chemicals that can damage the material or scale on the caliper.
The accuracy level of digital and manual calipers is actually the same, which is 0.01 cm or 0.1 mm. The main difference lies in the ease of reading the results. A digital caliper displays results automatically, thus reducing the risk of human reading errors, while a manual caliper requires manual reading and calculation, which is more prone to mistakes.
With proper care, a caliper can last for years, even decades. The key is to maintain cleanliness, store it in a dry place with a stable temperature, avoid impacts or drops, and perform regular calibrations. Manual calipers tend to be more durable because they do not have electronic components that can fail like those in digital calipers.
(kpl/fed)
Cobain For You Page (FYP) Yang kamu suka ada di sini,
lihat isinya
A complete guide on how to use baby oil for healthier, softer, and shinier hair. Learn the correct application steps and its benefits.

A complete guide on how to use baking soda for whiter and cleaner teeth. Learn about safe methods, benefits, risks, and tips for dental care with baking soda.

5CM PER SECOND is not an anime that provides sweet answers, but rather invites the audience to come to terms with the bitter reality of losing a loved one due to distance and time.

A complete guide on the procedures for electing an RT leader, from requirements, nomination mechanisms, to the execution of voting at the neighborhood level.

A complete guide to choosing the right body lotion for dry skin, from recognizing essential ingredients to care tips to keep the skin moist and healthy.

As the year 2026 approaches, senior comedian Opie Kumis chooses a different way to close out his year. Instead of a luxurious vacation, the man whose real name is Muchtar Luthfi is busy with social activities. Check out the full information below!

Serlina Shelley Soju is involved in a heated drama, ready to take legal action against the influencer for defamation of being a homewrecker.

A complete guide on how to choose good and fresh cucumbers for salads or side dishes. Learn tips for selecting quality cucumbers based on texture, color, and skin condition to avoid bitterness.

Amidst the issue of being Ridwan Kamil's mistress, this is Aura Kasih's response to Lisa Mariana's post.

Having not been seen on television or the big screen for a long time, senior actor Diding Boneng is apparently battling asthma. Check out the complete information regarding his health condition below!

It feels like an eternity waiting for the continuation of Jujutsu Kaisen, to witness the adventures of Yuji Itadori and friends in January 2026. While we wait, let’s take a moment to reminisce with one of the most memorable episodes from the first season.

A complete guide on how to choose good and quality purple sweet potatoes by paying attention to the skin, texture, color, and aroma for perfect processed results.