Kapanlagi.com - Risol, a timeless snack, has indeed become a favorite in the hearts of many. With its enticing crispy texture and mouthwatering filling, risol always manages to capture attention. However, to make risol even more enchanting, it is important to ensure that the breadcrumbs coat every side perfectly. In addition to providing the desired crunchiness, the breadcrumb layer also plays a significant role in the overall appearance of the risol, making it more tempting to enjoy.
Unfortunately, applying breadcrumbs to risol is not a trivial matter. Many people face challenges in this process, such as uneven coating or even the coating coming off while frying. This is where the importance of choosing the right breadcrumbs comes into play, which is key to achieving perfectly coated risol.
Recently, Instagram user @rossaambarita shared practical tips to achieve the desired results. From selecting the right measurements to effective coating techniques, all this information can serve as a guide for those who want to present beautiful and delicious risol. Ready to give it a try?
1. Pay Attention to the Dipping Batter Measurements
In the culinary world, the perfection of risoles lies in the right dipping batter! According to @rossaambarita, the main key to achieving crispy and appetizing risoles is a balanced ratio of water to flour. She recommends a ratio of 1:3, where for every 100 grams of wheat flour, you need about 300 ml of water. With this measurement, risoles weighing between 250 to 500 grams will get the ideal dipping layer.
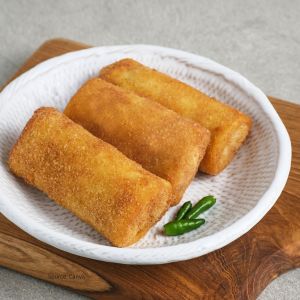
The right thickness of the dipping batter is the secret behind successfully adhering the breadcrumbs perfectly. "If the flour is at the right thickness, it (the breadcrumbs) will stick completely," she revealed in a post that has been viewed over 325 thousand times. So, make sure to follow this measurement so that your homemade risoles are not only delicious but also have a tempting texture!
2. Smooth the Breadcrumbs Well
In creating the perfect risol, attention to the quality of the breadcrumbs is just as important as the measurement. It is advisable to first grind the breadcrumbs using a chopper, so that the texture is softer and adheres better to the surface of the risol.
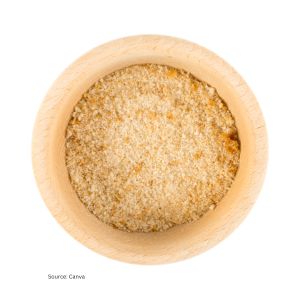
With finely ground breadcrumbs, every side of the risol will be evenly coated, preventing it from coming off while frying. As a result, the risol not only looks more appealing and neat but also keeps the filling inside safe, making your dish look appetizing and ready to delight the palate!
3. Dipping Risol into the Batter
Once the dipping batter and breadcrumbs are ready, the next step is the dipping process. Start by dipping the prepared risol into the mixture of flour and water. Make sure the risol is well coated so that the layer of breadcrumbs can adhere perfectly.
When dipping, lift the risol slowly with a fork to ensure that excess batter does not drip too much. This way, every part of the risol has just the right amount of flour layer without being excessive.
4. Coat the Risol with Fine Breadcrumbs
Next, the risol that has been dipped should be placed immediately into a container filled with finely crushed breadcrumbs. Press gently to ensure the breadcrumbs adhere evenly to the entire surface of the risol. This process ensures that the breadcrumb coating is maximized and does not easily come off when fried.
An even layer on the risol makes it look neater and more tempting. Additionally, each bite of the risol will feel crunchier and the texture will not easily break apart.
5. Fry with the Right Technique
The final step in creating an appetizing risol is to fry it until golden brown and crispy. Make sure the oil is hot before adding the risol to the pan, so that each bite feels maximized and the breadcrumbs do not absorb too much oil. By using medium heat, the risol will cook evenly and produce a beautiful and tempting surface.

The technique shared by @rossaambarita is not just a tip, but also a secret to achieving the perfect risol. With this method, you will not only be presented with visually appealing risol, but also a crunchy texture that delights the palate with every bite. Get ready to be amazed by the deliciousness of homemade risol!
6. Frequently Asked Questions about How to Make Risol
What is the function of breadcrumbs in risol? Breadcrumbs provide a crispy texture and an attractive appearance to risol, as well as helping to keep the filling secure while frying.
7. How to make the dipping batter for risol so that the breadcrumbs stick perfectly?
Use a ratio of 1:3 between flour and water, for example, 100 grams of flour with 300 ml of water, to achieve the ideal texture for the dipping batter to adhere to the breadcrumbs.
8. Why should breadcrumbs be finely ground?
Finely ground breadcrumbs will adhere more evenly to the risol, resulting in a neat and beautiful final product.
9. Do breadcrumbs easily come off when frying?
Breadcrumbs can easily come off if the dipping batter is not right or if the coating process is not done correctly. Ensure that the dipping batter is thick enough and the breadcrumbs are finely ground.
10. What are some tips to make risoles look appealing after frying?
Use fine breadcrumbs, coat the risoles evenly, and fry them in hot oil over medium heat so that they look neater and have a golden-brown color.
(kpl/mnd)
Disclaimer: This translation from Bahasa Indonesia to English has been generated by Artificial Intelligence.


