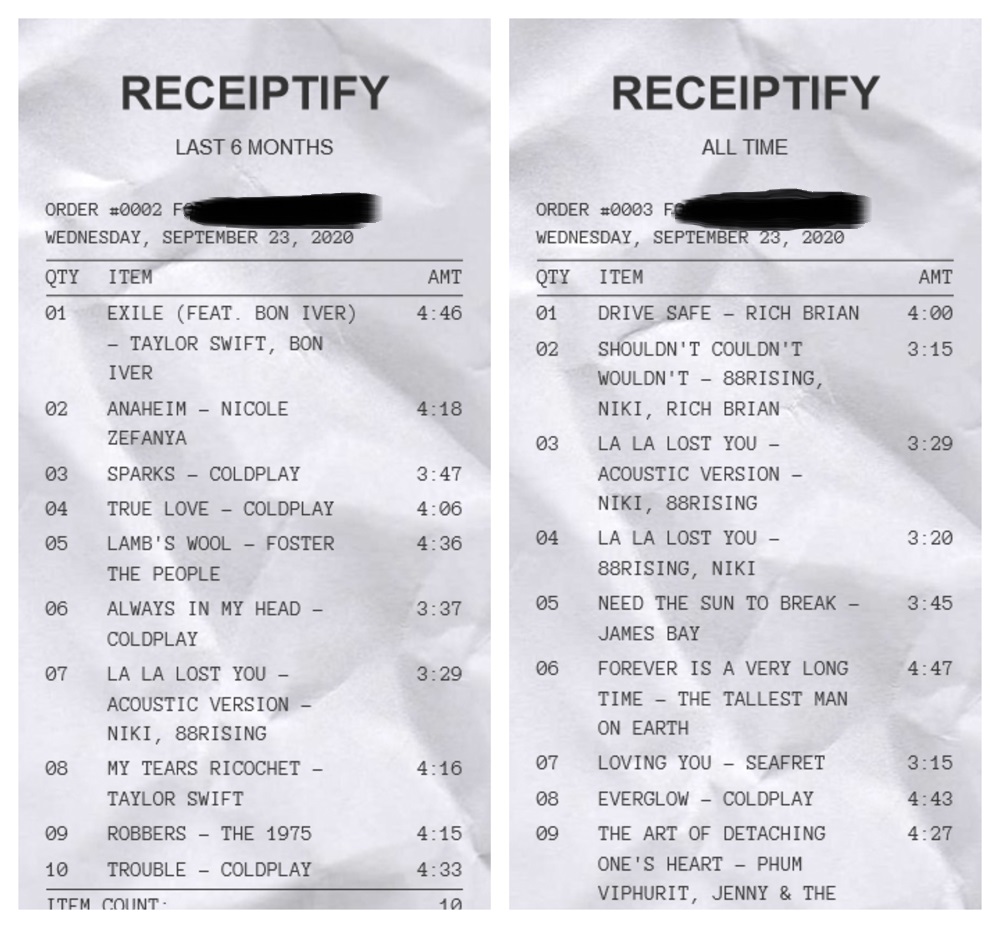
Kapanlagi.com - For those who often 'dive' into Instagram or Twitter accounts, you might be aware of the shopping receipt-like posts circulating on your timeline. The first question that comes to mind is probably something like, why are they uploading shopping receipts? Wait a minute, if you pay attention carefully, those uploads contain playlists or lists of songs known as Receiptify.
Wait, how can a receipt contain a list of songs? How do you make it? Don't imagine that the person posting will make the effort to edit each list of their songs, but you can make it yourself automatically on the website accessible through Herokuapps. So, what is Receiptify actually?
1. Favorite Spotify Playlist ala Shopping Receipt

Credit: Receiptify
Receiptify is currently trending among music lovers on social media. The content itself is in the form of a shopping receipt-like image that contains a list of the user's favorite songs on Spotify. So, the list included in Receiptify consists of the songs that the user plays most frequently.
Although Receiptify can gather a list of the songs you listen to most frequently on your Spotify account, this feature is not built-in to the music streaming application. On the website, Receiptify's content is created by Michelle Liu, who was inspired by the Instagram account @albumreceipt.
2. How to Create Receiptify
Want to join in on posting Receiptify to stay trendy? Here's how to do it easily.
1. Open the browser on your smartphone, go to the page receiptify.herokuapps.com.
2. Log in with your Spotify account by entering your email address and password.
3. Next, a consent page will appear explaining that Receiptify will access your Spotify account data and activities. This page also explains that you can revoke this access at any time. To proceed, click 'Agree'.
4. You will then see options for which playlist you want to create. There are 3 types of playlists: Last Month, Last 6 Months, and All Time. Click on one of them.
5. Wait a few moments for Receiptify to load the selected list of songs.
6. Once it appears, click 'Get Image' and you can share your own version of Receiptify on social media.
Tadaa, your own version of Receiptify is ready in seconds. Now you can share it on social media to join the hype too.
3. Hey, Be Aware of the Risks!
Even though it's trending, there's also no harm in being cautious about the risks you might experience. To create Receiptify, you give access to a third-party application to 'read' your Spotify account details. This means that there is a possibility that this application may access your personal data.
4. How to Remove Receiptify Access

(c) Shutterstock
After creating Receiptify, it's a good idea to immediately remove access to the generator from your personal Spotify account. This can be considered a mandatory security standard to protect your personal data, considering that there is a lot of important data stored in your Spotify account, such as email addresses, credit card numbers, and so on.
To remove Receiptify access from your Spotify account, follow these easy steps:
1. Visit the Spotify.com page, then log in with your account.
2. Next, select the three-line icon, choose the Account menu.
3. After that, select Applications, the page will display which applications have access to your Spotify.
4. Find Receiptify, click Remove Access.
5. After successfully completing the steps, Receiptify's access to your Spotify will be removed.
Following trends is fine, just don't forget about the safety of your own account, KLovers!
(kpl/wri)
Disclaimer: This translation from Bahasa Indonesia to English has been generated by Artificial Intelligence.


![[Quiz] What Type of Credit Card User Are You?](https://cdns.klimg.com/resized/646x323/p/headline/quiz-kamu-termasuk-tipe-pengguna-kartu--2136fc.jpg)


